Drywall is a common material used in walls but can easily get damaged from everyday use. From dents and dings to nail holes, drywall damage can look unsightly and ruin the overall appearance of a wall.
Thankfully, there are several steps you can take to prepare your walls for repair and painting effectively. These simple steps will ensure your repairs and new paint job look great!
Clean the Walls
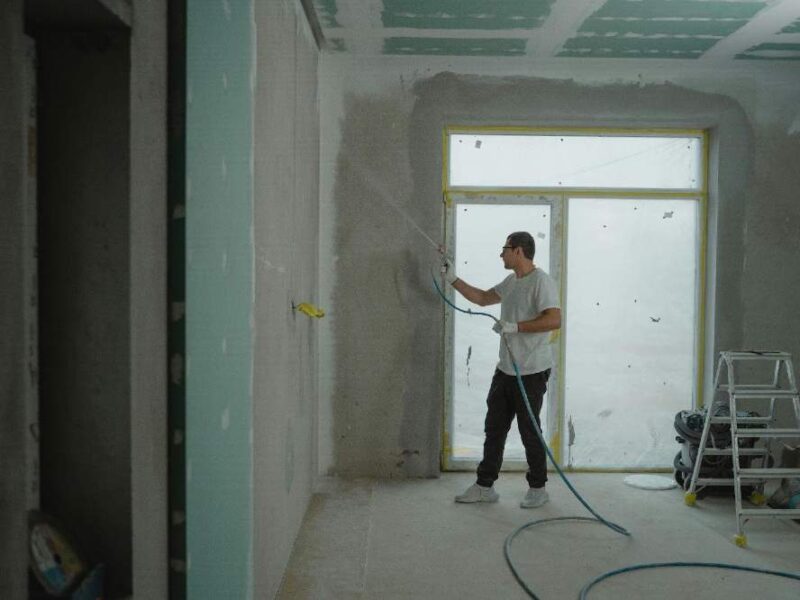
You should clean your walls before painting them because drywall is prone to becoming dirty. By removing any artwork or mirrors from the walls and covering smoke detectors and outlet covers to prevent paint spatter, you can hire drywall repair and painting services to speed up the procedure.
You should also wash those walls down if any rooms are exposed to much moisture, like kitchens and bathrooms. You can use a solution of three-to-four parts water to one part bleach to help disinfect them.
This method will eliminate mold, mildew, and other stains that can interfere with the final paint job. However, you’ll need to be extra careful if there’s any staining from tobacco smoke or other residues left behind from candles or fires in fireplaces.
Cleaning walls before you start painting is the best way to remove any dirt or dust from your paint. This will ensure your paint adheres to the wall’s surface without flaking or peeling.
Once the walls are cleaned, sanded, and primed, you can begin to paint. But you’ll need to wait at least 24 hours to allow the walls to dry before you paint them fully.
Sand the Walls
A good sanding job will leave your walls smooth and perfectly prepared for paint. It also reduces the likelihood that the sanded spots will have to be filled in with joint compound again later.
Getting the walls smooth will make your paint job easier and faster to apply, which means less work for you in the long run.
Before sanding, prepare your work area for dust by laying down dropcloths and using plastic sheeting to cover doors and window frames. This helps trap drywall dust in a sealed space and prevents it from escaping into other parts of your home.
While you’re working, wear a mask or respirator to avoid inhaling drywall dust that can be dangerous. This step is essential to avoiding lung cancer and other respiratory diseases.
After you’ve sanded your walls, apply tape to any cold-air return ducts and doorways in the room. This will keep drywall dust from drifting into other areas of your home and is also important for preventing mold buildup in the ceiling.
Next, with a pencil, mark all dings, pits, gouges, scratches, and sanded-through areas. This makes it easier to find them when you go back to touch up these spots with joint compound. Re-sand these spots when the joint compound has dried completely.
Prime the Walls
If you plan to paint a new drywall, it’s essential to prime the walls. This will ensure that the new paint adheres to the drywall properly, resulting in a smooth, professional finish.
Priming also helps to prevent paint from chipping, peeling, or fading. It also allows you to cover blemishes on the drywall more easily and provides a smooth base for your top coat of paint to adhere to.
It’s also important to prime the drywall before painting if it has been patched with spackle or joint compound. If you do not prime, the patches will soak up paint and show through the wall when it dries.
If the walls in your home have absorbed smells like smoke, pet odors, or strong-smelling foods, you’ll need to use a special primer to seal them out and make them smell fresh. A high-quality alcohol or oil-based primer will effectively seal these odors, keeping them from returning.
The most common reason for painting a new wall is to freshen the look of your home. It can be done quickly and effectively, and it can help to make your house more attractive.
You may be tempted to skip the priming step if you don’t have any stains or mold growing on your drywall. But this is a mistake. Drywall is porous and can absorb moisture, odors, oil, and even your paint. Without priming, the first coat of paint on a bare drywall wall will absorb unevenly, resulting in a splotchy paint job.
Paint the Walls
When you’re getting ready to paint the walls, it’s important to ensure they’re completely debris-free. Smoke detectors, outlet covers, mirrors, and other items should be taken down or covered before painting.
If any large areas of drywall need to be repaired, you may need to hire a professional. The best way to find a reputable painter is to look for one with experience repairing damaged drywall.
Alternatively, you can fix small dents and dings by using lightweight shrink-free spackling. Apply a thin layer to the dent or ding with a putty knife and sand it smooth when dry.
Once the spackling has dried, use fine sandpaper to sand the patch down to match the rest of the wall. It’s important that the sanding is done properly, as over-sanding can lead to additional damage to the wall.
If you have a lot of torn paper, you may need to seal the area with joint compound or paint. This helps to protect the drywall and prevent it from peeling and chipping during the painting process.